
How do you build a brick retaining wall

When considering a method to hold back soil on a sloped property, installing a solid masonry structure can make a noticeable difference. It involves planning, some heavy work, and attention to detail. I think many underestimate the groundwork needed; even small mistakes in preparation can cause trouble later.
Starting with a stable foundation is important. Digging a trench to the right depth and adding compacted gravel provides a firm base. I’ve seen cases where skipping this step caused sections to lean within months. Water management is another factor to watch. Installing a perforated pipe or proper drainage behind the barrier prevents pressure from accumulating behind it.
Laying each unit takes patience. Mortar consistency affects how well the pieces stay in place; too dry and it crumbles, too wet and alignment shifts. I often adjust individual units several times before they feel right. These small corrections may seem tedious, but they make a difference over time.
Finishing steps matter as well. Filling gaps, checking levels, and gradually compacting soil behind the structure helps it last. It isn’t an exact science, and sometimes trial and error teaches more than careful planning. Still, seeing the structure hold after heavy rain or snow can be surprisingly satisfying.
Site Preparation Steps for Marking Layout and Excavating the Trench
Before any construction begins, careful preparation of the area is necessary. Clearing debris, removing large stones, and trimming overgrown vegetation sets the stage for a solid structure. I often notice that skipping these steps leads to more adjustments later, which can be frustrating. Planning the layout accurately is another detail that deserves attention. Measuring distances and marking straight lines ensures the placement of each unit is consistent. Tools like stakes, string, and a level come in handy here. For guidance on professional approaches, check out retaining walls in Calgary.
Excavating the trench requires precision. Depth varies depending on the height of the intended structure and soil type. I usually suggest digging slightly deeper than the minimum to accommodate a gravel base. Compacted gravel improves stability and helps manage water, which otherwise can cause shifting. Speaking of water, installing basic drainage in this initial stage often prevents issues down the line. If you prefer expert assistance, landscaping and retaining walls specialists can provide insight.
Marking the Layout
Marking involves more than just drawing lines. Check corners carefully and double-check measurements. Slight misalignment at this stage can lead to uneven courses later. I sometimes adjust the string several times before everything looks right. Consulting with a retaining wall contractor can help clarify any uncertainties and confirm your plan is realistic.
Excavating the Trench

Once the layout is set, excavation begins. Keep the trench uniform in width and depth, and remove loose soil as needed. Compact the base material to prevent settling. Gradually filling and leveling as you go can save time and reduce the risk of future repairs. If managing the project feels overwhelming, experienced retaining wall contractors can handle this part efficiently and provide guidance on best practices.
Techniques for Creating a Stable Base Layer and Installing Drainage
Establishing a firm foundation is critical for any masonry structure intended to hold back soil. The trench should be filled with compacted gravel, about 4 to 6 inches thick, depending on soil type. I usually tap each layer with a hand tamper to make sure it is level and dense. Uneven spots at this stage can cause problems later, so patience matters more than speed.
Drainage is another step that many overlook. Water pressure behind the structure can push units out of alignment over time. Installing a perforated pipe at the base and surrounding it with coarse gravel allows water to escape. I sometimes add a layer of geotextile fabric to prevent soil from clogging the gravel; it adds a little extra work, but it pays off.
When preparing the base, keep these points in mind:
- Check the depth frequently with a level and measuring tape.
- Compact each layer thoroughly to minimize settling.
- Slope the gravel slightly away from the structure to direct water flow.
- Ensure the pipe outlet is clear and leads to a safe drainage area.
Even small adjustments at this stage can make the following steps much smoother. If managing the details feels tricky, consulting experienced retaining wall contractors can help ensure stability and longevity. They can provide tips specific to your soil conditions and property slope, which often avoids costly mistakes down the line.
Methods for Laying Units, Checking Alignment, and Securing the Structure
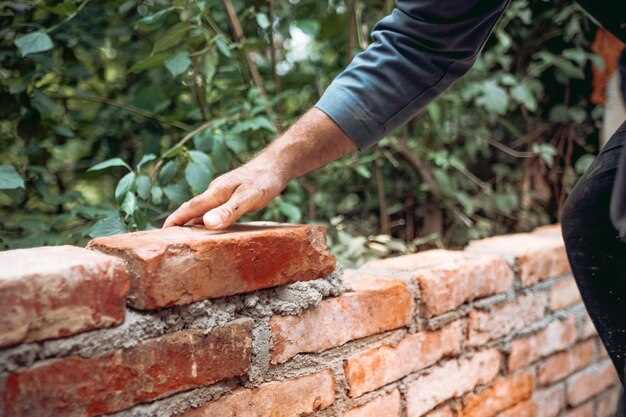
Placing each masonry unit requires patience and attention. Mortar consistency should be just right; too dry and the pieces do not stick, too wet and they slip. I often adjust units several times before they feel stable. A level and string line help keep each row straight, and I recommend checking alignment after every few courses to avoid noticeable deviations. For examples and professional support, consider retaining walls near me.
Maintaining Straight Courses
Using a taut string along the length of the structure helps keep rows uniform. Frequent checks with a level can catch small shifts early. I sometimes tap a unit gently with a mallet to adjust it; it is slow but effective. Small misalignments can compound quickly if ignored, so periodic reassessment is worthwhile.
Securing the Units
After laying a few rows, allow the mortar to set slightly before continuing higher courses. Backfilling gradually behind the structure adds support and reduces pressure on lower units. Compacting the soil carefully and checking for levelness along the top ensures long-term stability. Paying attention to these details during installation makes a noticeable difference in durability.
Q&A
What is the best way to prepare the ground for a masonry soil barrier?
Preparing the area requires clearing debris, leveling the surface, and digging a trench to the proper depth. Adding compacted gravel provides a stable base and helps prevent shifting. Many people overlook drainage at this stage, but installing a perforated pipe behind the structure allows water to escape and reduces pressure on the units.
How deep should the foundation trench be for a small structure?
For structures around two feet high, a trench depth of 6 to 8 inches for the gravel base is usually sufficient. If the soil is loose or clay-heavy, slightly deeper excavation may be needed to ensure stability. Checking with a professional or measuring carefully can save time and prevent sections from leaning later.
What techniques help keep courses straight during installation?
Using a taut string along the length and checking with a level frequently ensures straight rows. Small adjustments with a mallet or tapping the units can correct misalignment. Periodic reassessment as the structure rises avoids cumulative errors that can be difficult to fix later.
How should drainage and backfill be handled once units are in place?
After laying several courses, gradually backfill with coarse gravel or compacted soil behind the structure. This supports the units and reduces lateral pressure. Maintaining slight slope away from the structure helps direct water toward drainage areas. Checking levels along the top ensures uniform height and prevents uneven settling over time.


