
How to build a cinder block + concrete retaining wall

I’m Greg at Sungreen Landscaping Inc out in Calgary, and I’ve lost count of how many yards I’ve seen where the slope “was fine” until the first real rain and a spring thaw showed up together. Soil moves. Water pushes. Frost does its thing. And the little stacked barrier that looked straight in July starts looking tired by October. You don’t need to be paranoid about it, but you do need a plan that deals with drainage, base prep, and the kind of weight that’s going to sit behind the face.
This article is about a CMU-and-poured-mix style grade support, the kind you see on older properties and on jobs where you want a solid, mortar-set look instead of a segmental system. I’ve helped repair plenty of these after shortcuts, and honestly it’s usually the same story. No clear stone behind it, no filter fabric, no drain pipe, or a footing that was poured on soft subgrade because somebody was in a hurry. It lasts a bit, then you get the lean, the cracks, and the gaps that catch your eye every time you walk past.
If you’re also trying to figure out the money side before you commit, we’ve got a separate read on how much does it cost to repair a retaining wall. Repairs can be simple, or they can turn into a full tear-out once the base and drainage are wrong. That’s why getting the foundation, the drainage layer, and the reinforcement details right matters so much on day one.
At Sungreen we’ve been putting outdoor spaces together since 1990, everything from patios and paving stones to fences, pergolas, lighting, sod, irrigation, and grade supports like this. If your project is over four feet, we pull the City of Calgary permit and get an engineer involved, because that’s where the risk jumps. If you want to talk it through, we do free consultations and 2D design samples, and you can reach the office at (403) 256-7500. I’m not saying you need us for it, but I am saying you should treat this like a real structure, because that’s what it is most of the time, at least.
Masonry Units + Poured Mix Garden Grade Support
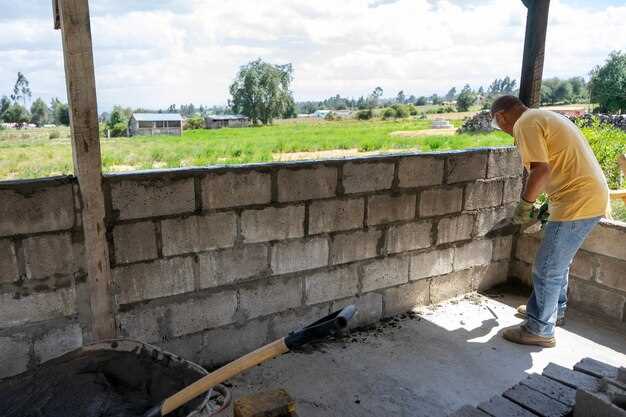
I have seen a lot of yard grades in Calgary that look fine until spring melt, then the slope starts slumping and the patio edge goes with it. If you are pairing hollow masonry units with a poured mix core, treat it like a small structure, not a weekend stack-up. Your trench needs to sit below frost-affected soil, and the base wants compacted gravel that does not squish under your boots. Set a straight guide line, check level every course, and keep an eye on alignment because tiny errors turn into a bow fast. Well, usually anyway.
Footing, drainage, and reinforcement
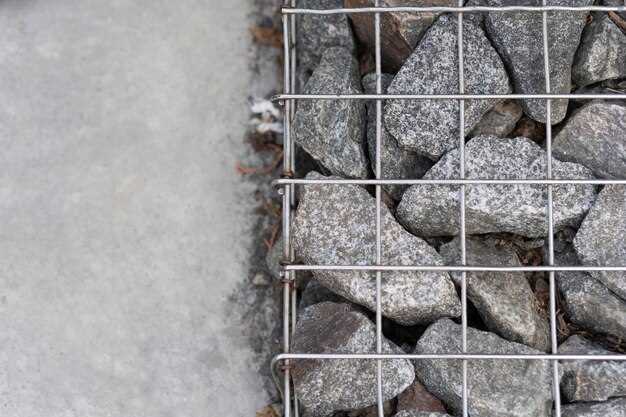
The part homeowners skip is the stuff you do not see after. A proper footing pad, then drainage stone behind the face, plus a perforated drain line that exits to daylight. That is what stops hydrostatic pressure from pushing everything forward. Inside the hollow cores, place vertical rebar where your design calls for it, tie it into the footing steel, then fill the cells with a poured mix so the whole run acts together. If the grade is tall, or you are near a driveway where loads add up, get an engineer involved and pull permits as required. For anything over 4 feet, we do that at Sungreen, no arguing, and it saves people from expensive do-overs later.
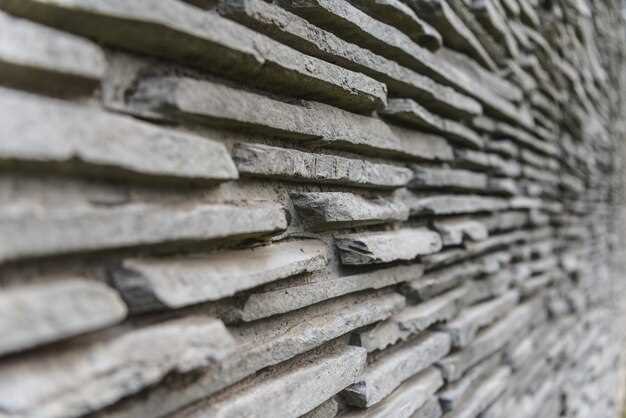
Face work and clean terminations
Once the structure is stable, you can think about the face and the ends. This is where I see odd choices, like leaving a raw edge that catches water and freezes apart. Cap units need full bedding and a slight pitch back so water does not sit on top. For details on finishing the run cleanly, this guide is handy: how to end a block retaining wall.
If you want us to look at your site, we do free consultations and a simple 2D sketch sample so you can see grades and steps before anything is dug. We have been doing outdoor spaces since 1990 out of 232043 Range Rd 283, Rocky View County, and we handle the full scope from design through construction, with a signed warranty and a warranty rep assigned after. Call (403) 256-7500 if you want a straight answer on whether your slope needs this kind of assembly or something simpler.
Site layout, height limits, and footing trench dimensions for a block-style garden barrier
Site layout is where you save yourself grief later. I like to mark the face line with string and stakes, then step back and look from the street and from your patio door, because that is where you will notice a wobble or a weird curve. Check where downspouts land, where the snow melt runs in spring, and where you plan to put stairs or a gate, since those spots change the footprint. If you are unsure, send us a sketch and a couple photos during a free consult and we will talk it through the same way we do on our Calgary jobs, a bit of measuring, a bit of common sense, and a lot of “where does the water go.”
Height limits are not just a paperwork thing, they decide what kind of system you are allowed to do safely. Once you get past about 4 feet, you are into engineered territory most of the time, and in Calgary that usually means permits through the City and stamped drawings. We handle that for bigger jobs, but I still tell homeowners to keep it lower if they can, split the grade into two shorter tiers with a flat bench between, and you get less pressure, less risk, and it usually looks cleaner.
Now the trench. The base groove needs to be wide enough that you are not balancing your first course on a skinny ledge. A simple rule I use is: trench width equals the unit width plus room on both sides to get your level and tamper in there, so it is not a knuckle-scraper. Depth depends on frost, soil, and your first row embedment, and if you want a quick refresher on typical embedment ratios, this page is a decent read: how deep should a retaining wall be.
In our area you also have to think frost. Calgary clay likes to grab moisture and heave, so if your trench base is sitting on soft muck or topsoil, you are setting yourself up for seasonal movement. Strip organic stuff, get down to firm subgrade, then bring in a well-graded crushed rock and compact it in lifts. I have watched people skip compaction because “it looks packed,” and then the whole face line settles unevenly after one winter. It is not fun to fix.
Another layout detail that ties right back to footing dimensions is batter and room for drain rock. You need space behind the face for clear stone and a drain line, plus a filter fabric wrap so fines do not plug it. If your trench is tight to a fence post, or you are trying to squeeze it right on the property line, you end up cheating the drainage zone, and that is where you see bowing later. Most of the time, at least.
If you want us to look at your yard, we can come out, shoot grades, and tell you what height is realistic without turning your side yard into a construction zone. Sungreen has been doing outdoor spaces since 1990, and we do the whole package from design through install, plus a signed warranty and a warranty rep if anything shifts. Call (403) 256-7500 and we will sort out the layout and trench sizes before you start digging in the wrong spot.
Q&A:
How deep should I dig for the footing and base under a cinder block retaining wall?
Depth depends on wall height, soil, and freeze conditions. A common approach for small to medium retaining walls is: dig to undisturbed soil, then add a compacted gravel base (often 6–12 in / 150–300 mm), and pour a concrete footing below that where required. In frost areas, the bottom of the footing is often placed below local frost depth to reduce heave risk. For many residential walls, a footing thickness around 6–8 in (150–200 mm) with extra width beyond the block (so the wall doesn’t “teeter”) is typical, but local rules may demand more. If your wall is taller than about 4 ft (1.2 m) or supports a driveway/slope, check local code and consider an engineer—footing size can change fast with loads and soil type.
Do I need rebar in a concrete block retaining wall, and how is it usually placed?
Rebar is commonly used because block alone isn’t great at handling bending from soil pressure. A typical setup uses vertical rebar set into the footing (often at 16 in or 24 in on center, depending on design). The bars extend up through the hollow cores of the CMU blocks. Horizontal reinforcement is often added using bond beam blocks (U-shaped CMU) where rebar runs along the wall—frequently near the top and sometimes at intermediate courses on taller walls. After rebar is in place, the reinforced cores and bond beams are filled with concrete or grout. The exact bar size and spacing varies (soil, wall height, backfill, surcharges), so use the article’s specs if it provides them, and confirm against local requirements for structural walls.
What’s the right drainage setup behind the wall to prevent cracking or leaning?
Drainage is usually the difference between a wall that stays straight and one that starts moving. A standard detail is: free-draining gravel behind the wall (often 12 in / 300 mm thick or more), a perforated drain pipe at the base that runs to daylight or a proper outlet, and a filter layer so soil doesn’t clog the gravel. Many builders place a fabric filter between native soil and the gravel; another option is graded aggregate with fewer fines, but fabric is common. The drain pipe typically sits beside the footing at the lowest point, with a slight slope toward the outlet. Add weep holes only if your design calls for them; with a well-placed drain line, weep holes aren’t always necessary. Don’t backfill with heavy clay right against the blocks—water pressure builds quickly and pushes hard.
Can I build a cinder block + concrete retaining wall as a DIY project, or should I hire help?
You can DIY a short wall if you’re comfortable with excavation, leveling, and handling concrete. The make-or-break parts are: a level, well-compacted base; a straight first course; and clean drainage. Expect the work to be physical—moving block, mixing/pouring concrete, and hauling gravel. Hire help (or at least get a design checked) if the wall is tall (commonly over ~4 ft / 1.2 m), if it holds back a steep slope, if there’s a load above it (parking, a structure, a fence with wind load), or if the soil is soft/expansive. Also call utility locating before digging. A small mistake in grade or drainage can show up later as bulging, cracking, or rotation.

