
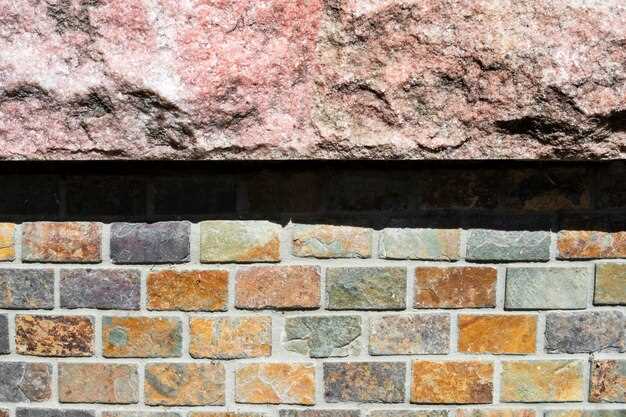
How to cut retaining wall blocks

If you work with concrete units that hold back soil, sooner or later you face the same moment. One piece does not fit. The line is off. The curve feels wrong. You stand there, marker in hand, thinking about what needs to change. I have seen this many times on sites around Calgary, and it never feels abstract. It is practical, a bit tense, and very real.
At Sungreen Landscaping Inc, this part of the job often slows people down. You want clean edges. You want tight joints. You also want the piece to stay strong after shaping. Weather matters here. Cold mornings, dry summers, and freeze cycles all add pressure. A sloppy job shows fast, sometimes within one season. That is why this task deserves care.
You might think the process is all about power tools. It is not. Measuring, marking, and patience play a larger role than most expect. I think many issues come from rushing. You rush once, then you redo the piece. That costs time and material. One Calgary project last year needed three replacements because the first pass was off by less than a centimetre.
This guide speaks directly to you and your project. It focuses on shaping concrete units used to support soil on residential and commercial sites. Straight runs, gentle curves, tight corners. The goal is simple. Help you prepare each piece so it fits cleanly and stays put through real Alberta seasons.
Shaping Concrete Units for Grade Support Structures
You usually notice the issue once the row reaches a corner or a gentle bend. The concrete piece sits proud or leaves a gap. At that point, forcing it rarely works. You need to reshape the unit so it follows the layout you marked on the ground. This task looks simple, yet mistakes show fast once backfill goes in.
Before touching any power tool, spend time with layout lines. Chalk and a square help more than people expect. Measure twice. I think most errors come from skipping this step. On one Calgary yard job, a five millimetre mismatch repeated across ten units pushed the whole line out by almost five centimetres.
Tool choice and setup
For dense concrete units used to hold back soil, a gas saw or electric saw with a diamond blade works best. Angle grinders handle smaller adjustments. Keep the blade depth shallow on the first pass. Let the tool do the work. Forcing it leads to chipped faces and uneven edges.
Always work on a stable surface. A wobbling piece shifts under vibration. That small movement turns into a crooked edge. Eye and ear protection matter here. Concrete dust builds fast, especially on dry Alberta days.
Making controlled passes
Score the surface along your line first. One clean guide reduces wandering. After that, deepen the pass gradually. Three lighter passes usually leave a cleaner face than one heavy push. Curves take patience. Rotate the unit, adjust your stance, and keep checking alignment against the layout.
Once shaped, test fit the piece right away. Do not assume it works. Set it in place, step back, and look at the joint. If it feels off, correct it before moving on. Small fixes are easier now than later, when everything locks together.
Selecting Proper Tools for Shaping Concrete Units
The tool you choose sets the tone for the whole job. Dense concrete pieces used for soil support react differently than standard pavers. Some tools chew through too fast. Others stall and leave rough edges. You want control, not speed. That balance matters on residential builds and larger projects tied to a retaining wall in Calgary, where frost and movement test every joint.
Power saws and blades
Gas saws handle thick concrete well. Electric saws work too, though they need steady power and dry conditions. A diamond blade rated for masonry makes a clear difference. Cheap blades wear out fast and wander off the line. On one Sungreen Landscaping Inc site, swapping blades mid job fixed edge chipping right away. Blade diameter matters. A fourteen inch size covers most shaping tasks without forcing the tool.
Handheld options and safety gear
Angle grinders suit small adjustments and curved sections. They give more feel, though they take patience. Use them for trims under twenty millimetres. Anything more risks uneven faces. Whatever tool you pick, wear eye and ear protection. Concrete dust builds quicker than expected. Gloves help too. Vibration fatigue shows up after a few pieces, and that is usually when mistakes creep in.
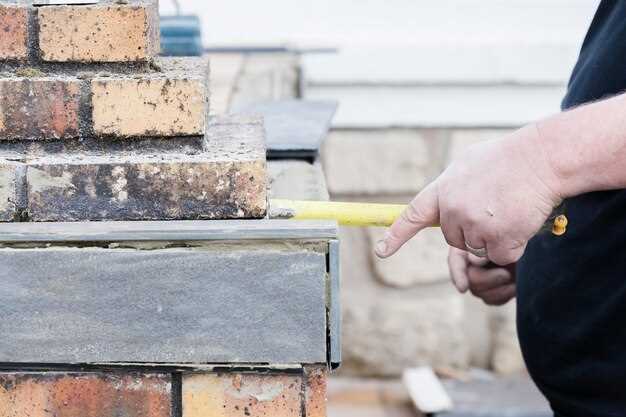
Marking and Measuring Concrete Units for Clean Edges
Most layout problems begin before any saw comes out. Concrete units need clear reference points. Without them, lines drift and joints open up. You see it fast on projects tied to landscaping retaining walls, where visual alignment matters from the first row.
You should treat every piece as slightly different. Manufacturing tolerances vary. A unit marked yesterday might not match the next one. I think that surprises many homeowners. Measure each piece on its own. Do not assume uniform size.
- Use a carpenter square to keep faces aligned.
- Mark both the front and top surfaces.
- Check dimensions twice before moving on.
Chalk lines work well for straight runs. For curves, a pencil gives better control. Press lightly. Thick lines hide errors. On a Sungreen Landscaping Inc site last season, thin marks reduced face gaps by about eight millimetres across a long radius.
Spacing also matters. Dry fit a few units before marking the rest. Step back and look. If something feels off, it probably is. Adjust early. This habit saves material and time, especially on decorative builds like those shown in how to build a decorative retaining wall.
- Set the unit on a flat surface.
- Confirm height and depth with a tape.
- Transfer the line across all visible faces.
Take breaks. Rushing leads to crooked marks. Once a line is wrong, every step after becomes harder. Care at this stage keeps joints tight and faces clean through Calgary freeze cycles.
Step-by-Step Shaping Techniques for Straight and Curved Concrete Units
Working with concrete pieces for soil support requires patience. Straight runs are easier. Curves demand more attention. You want edges that align and joints that fit snugly. On projects similar to those explained in how to build a retaining wall, mistakes show immediately once the row is in place.
Begin by securing the unit on a stable surface. Check your layout lines and ensure everything matches your measurements. Small shifts at this stage lead to noticeable gaps later. For straight cuts, follow the line slowly, keeping the blade steady. Avoid pressing too hard. Let the tool guide the path.
Curved pieces need a different approach. Move the unit rather than forcing the blade to twist. Multiple shallow passes work better than one deep pass. Stop often to check alignment with the rest of the row. I remember one Calgary backyard project where a gentle curve took nearly twice the time of a straight run, but the fit was cleaner and required no rework.
Here are some practical steps you can follow:
- Set the piece flat and verify your markings.
- Use a diamond-tipped saw for long edges and an angle grinder for trims.
- Score along the line first, then deepen gradually.
- Check fit frequently, adjusting as needed.
- Wear safety gear. Concrete dust is heavy and loud.
After shaping, dry fit the unit with the rest of the row. Adjustments now are easier than after final placement. Taking these steps carefully ensures your project holds together and looks consistent through seasonal shifts.
Q&A:
What tools are best for shaping concrete units used in soil support structures?
For heavy concrete pieces, a gas-powered saw or an electric saw with a diamond-tipped blade works well for long, straight edges. For smaller trims or curved sections, an angle grinder gives more control. It is important to let the tool guide the cut and avoid forcing it, which can lead to chipped surfaces. Consistent blade depth and multiple light passes usually produce cleaner edges than one heavy pass.
How should I measure and mark concrete pieces to ensure a precise fit?
Measure each unit individually, as manufacturing tolerances can vary slightly. Use a carpenter square and a tape to mark both the top and the front faces. For straight runs, a chalk line is helpful, while pencil marks work better for curves. Dry fitting a few pieces before marking the rest lets you check alignment and spacing. Small adjustments at this stage save time and material later.
Are there safety precautions I need to consider while shaping these concrete units?
Yes, safety is important. Always wear eye and ear protection, as concrete dust can build quickly and saws are loud. Gloves reduce vibration fatigue, which can affect precision. Secure each piece on a stable surface to prevent shifting under vibration. Even small movements can result in uneven edges or mistakes, so take your time and maintain proper stance throughout the task.
What is the best approach for shaping curved sections compared to straight edges?
Curves require more attention and patience. Instead of forcing the saw to twist, rotate the concrete unit slowly and make multiple shallow passes along the line. Stop frequently to check alignment with surrounding pieces. Using a pencil to mark curves rather than thick chalk lines helps maintain accuracy. Straight edges are simpler, but curves need repeated checks to ensure joints remain tight and uniform.
Can mistakes in shaping affect the stability of the completed project?
Yes, even small errors can affect alignment and joint integrity. A misaligned piece creates gaps that may shift over time, especially during freeze-thaw cycles in Calgary. That is why measuring, marking, and checking each unit before final placement is critical. Dry fitting pieces and making corrections early reduces the risk of instability and avoids having to replace sections later, saving both time and material.
What is the safest way to reshape concrete units for soil support without damaging them?
Start by securing the unit on a stable surface. Use a saw with a diamond blade for straight edges and an angle grinder for small trims or curves. Make multiple shallow passes rather than a single deep one. Keep the tool moving at a steady pace and let it guide the cut. Always wear protective gear, including eye and ear protection, and gloves to reduce vibration fatigue. Check your progress frequently by dry fitting the piece with adjacent units to ensure a proper fit.
Can I prepare curved sections of concrete pieces without specialized tools?
Yes, but it requires patience and careful handling. Mark the curve clearly with a pencil, keeping the line thin. Rotate the unit rather than twisting the tool to follow the curve. Use light, repeated passes instead of one deep cut. This method gives more control and reduces chipping. Small adjustments can be made with an angle grinder for finishing. Dry fit the unit as you go to make sure it aligns with the surrounding pieces. Even simple setups work if you take your time and focus on accuracy.


