
How to build a 90 degree corner retaining wall

I have lost count of how many yards in Calgary I have seen where someone stacks block in an L-shape, steps back, feels proud, and then winter shows up and the inside turn starts to open up like a zipper. That inside turn is where pressure and frost like to argue with your work. If you get the base right, the drain rock right, and you keep your lines honest, the whole thing behaves. If you rush it, that inside joint becomes the weak spot and you will notice it every time you walk past.
Most people focus on the face because that is what you see from the patio, but the stuff you do not see is what keeps it from moving. The base trench depth, the compacted gravel, the geogrid when it is needed, and the drain pipe placement, those are the real make-or-break parts. And yes, I know the internet loves to argue about adhesives, so if you are wondering, do you have to glue retaining wall blocks is a good read before you commit to one method and regret it later.
Another thing that trips up homeowners is the boundary question. You might have a straight run planned along a fence line and then that inside turn lands right near the edge of the lot. That is where you pause and check the rules, talk to the neighbour if needed, and avoid a surprise later. If you are unsure, this covers the basics: can you build a retaining wall on the property line.
I am Greg at Sungreen Landscaping Inc, we are based out in Rocky View County at 232043 Range Rd 283 and we have been putting outdoor spaces together since 1990, patios, paving stone, fences, pergolas, irrigation, lighting, the whole package. I write these notes because the owner asks me to, and because I have watched too many DIY jobs fail for the same predictable reasons. If your existing structure is already leaning or cracked and you are past patching, this page lays out what replacement looks like: how to replace a retaining wall.
One last thing before we get into layout and base prep. Keep the block clean as you go. It sounds fussy, but dusty joints and muddy faces make your work look sloppy fast, and stains can set in after the first rain. If you have older units you are trying to match or reuse, this helps: how to clean retaining wall blocks. If you want us to look at your site, we do free consultations with a simple 2D concept, and if the structure is over four feet we pull the City of Calgary permits and bring an engineer in. Call (403) 256-7500 and we will tell you straight what you are dealing with.
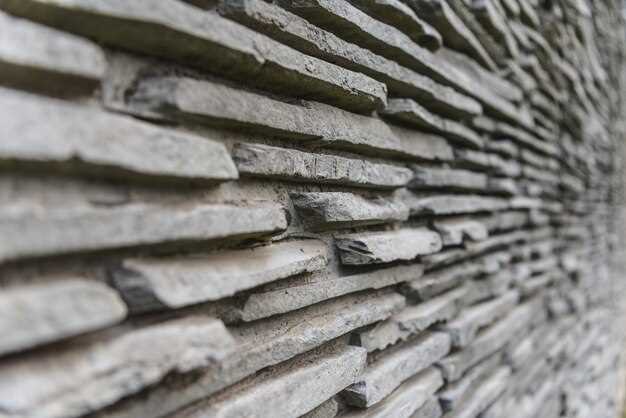
Forming a Clean 90° L-Shape with Segmental Block
A right-angle L-shape is where you find out fast if your base prep is actually flat and square, because the first few courses will tell on you. I have seen homeowners “eyeball” the turn, then wonder why the faces don’t line up and the caps look like a zipper. Set tight stringlines on both runs, check diagonals, and keep the first course dead level on compacted road crush. If you want a simple walkthrough of the general method with segmental units, this page is solid: how to build a block retaining wall.
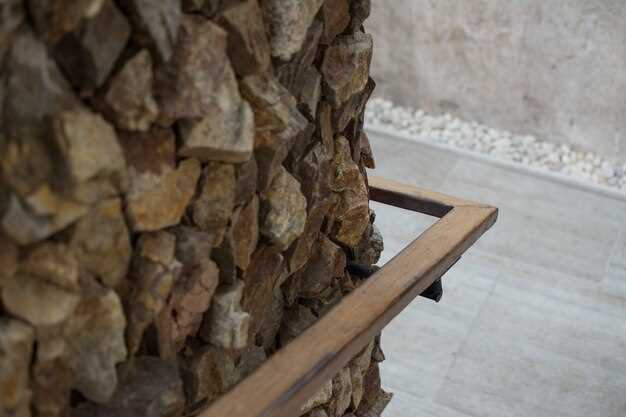
Drainage at the Inside Turn
The inside of the L is the spot that likes to trap water, and water is what pushes things out of place, not the soil by itself. Run a proper drainage rock zone behind the units, wrap it with filter fabric, and tie a perforated pipe through the turn so it still has somewhere to daylight or connect to a sump. In Calgary, freeze-thaw will punish shortcuts, and I have watched a tidy looking job shift one spring because the pipe stopped at the turn like it was the end of the line. If you are hiring help or you want to see what we handle from design through construction (and yes, we pull City permits and bring in an engineer for anything over 4 feet), check landscaping retaining walls.
That L-shape also concentrates loads, so if you are stacking higher than you think you are, or you are parking a shed pad or paving right near the top, add geogrid layers and step them back properly. If the face has already started to lean or crack, don’t just glue caps and hope. The fix is usually excavation, better base, and proper reinforcement, and this guide covers the main options: how to reinforce a retaining wall.
One last thing people ask me about after something shifts is insurance, usually after the rain has already found the weak point. Policies vary a lot, and it depends on cause, drainage, and whether it was installed to code, so it is worth reading up before you assume anything: do homeowners insurance cover retaining wall. If you want us to look at your yard, we do free consultations and 2D design samples, and you get a signed warranty when the job is done. Call (403) 256-7500 and we can talk through the turn, the drainage outlet, and what height you are really dealing with.
Lay Out the 90° Turn: String Lines, Batter Boards, and Squareness Checks
Before any base gravel goes down, I like to see the layout locked in with strings, not spray paint. Paint disappears once you start digging, and then you are guessing. Strings stay honest. On Calgary sites with mixed clay and fill, that little bit of guesswork turns into a crooked run fast, and you will fight it the whole way.
Set batter boards back from the excavation so you do not kick them loose while you work. I use simple stakes and a horizontal board, then pull tight mason line for both runs of the turn. Keep the strings high enough that you can dig and compact under them, but low enough that you can measure down to your base elevation without doing gymnastics. If you are also trying to figure out terminations and returns at the ends, this guide helps: how to end a block retaining wall.
Squareness checks that actually catch mistakes
Most homeowners check “square” by eyeballing it, and I can usually tell from the sidewalk. Use the 3-4-5 method, but scale it up. I like 6-8-10 or even 9-12-15 if there is room, because small triangles hide small errors, and those errors stack. Measure from the intersection point down one string, mark it, then measure the other string, mark it, and the diagonal between marks should match the long side. Adjust the batter boards, not the string itself, so your line stays tight.
Then do a diagonal-to-diagonal check across the footprint of the two runs, not just near the intersection. I have seen a run start square and then wander because the second batter board was set on a slight skew, and nobody noticed until the first course went in and the gaps started showing. You want the string line to represent the face, and you want consistent offset for the base trench too, so you are not digging a “banana” shape.
Keep the layout tied to real material sizes
Block dimensions matter for layout, especially around a right-angle turn where cuts and bond patterns show. If you are pricing things out and deciding between sizes, take a look here: how much are retaining wall blocks. I have watched people set strings to a nice clean measurement, then realise their units land with a sliver cut at the turn, and now the nice clean measurement is gone anyway.
Once you are happy, write the key measurements on the batter boards in marker. Sounds basic, but it saves you when a kid bumps a stake or a bobcat tire nudges something. At Sungreen we have been doing outdoor spaces since 1990, and I still like this old-school setup because it prevents a lot of “close enough” decisions. If you want a hand, we do free consultations and 2D design samples, and you can reach us at (403) 256-7500. We can also handle the full scope, from layout through construction, with warranty coverage so you are not stuck fixing someone else’s crooked lines later.
Q&A:
How do I keep a 90° corner retaining wall from splitting or opening up at the joint?
The corner is a high-stress point because the soil pushes from two directions. Use a bond pattern that physically ties the two legs together: alternate long and short blocks (or “corner units”) so each course overlaps the other wall by at least one block length. Avoid stacking vertical joints at the corner—stagger them like brickwork. Add extra reinforcement at the corner: extend geogrid layers from both legs and overlap them across the corner area so the reinforcement zones interlock. Also compact backfill in thin lifts and keep drainage gravel continuous around the corner; trapped water behind a corner often causes movement that shows up as cracking or joint opening.
What’s the best way to lay out and excavate the base trench for a right-angle wall so the corner stays square?
Mark the two wall lines with string lines and stakes. To get a true 90° angle, use the 3-4-5 method: measure 3 units along one line and 4 units along the other, then adjust until the diagonal between those marks is 5 units. Repeat with larger numbers (6-8-10) for better accuracy. Excavate a trench wide enough for the block depth plus working room, and deep enough for a compacted base layer plus the buried first course. Level the trench base carefully—most corner problems begin with a base that is flat on one leg but slightly high or low on the other, forcing the corner blocks to rock. Check level in both directions at the corner and along each leg before placing any blocks.
Do I need geogrid reinforcement for an L-shaped (90°) retaining wall, and how do I run it through the corner?
Whether you need geogrid depends mainly on wall height, soil conditions, slope above the wall, and nearby loads (driveways, sheds, fences). For many small garden walls, gravity construction may be enough; for taller walls, soft soils, or added loads, reinforcement is commonly required. At the corner, run geogrid from each wall leg back into the retained soil, and overlap the grid from the two legs in the corner zone so they “lock” together. Don’t cut the grid short right at the corner; the corner needs the most restraint. Keep the grid layers flat, fully tensioned, and placed on compacted fill, then cover with the specified thickness of fill before compacting to avoid shifting the grid.
How should drainage be handled at a 90° corner so water doesn’t build up behind the wall?
Use a continuous drainage zone behind both legs: clean crushed stone directly behind the blocks, with a filter fabric separating stone from native soil to reduce clogging. Install a perforated drain pipe at the base of the wall, set in gravel, and pitch it to daylight or to a proper outlet. At the corner, keep the pipe unbroken if possible; if you must turn it, use smooth fittings and maintain slope through the turn. Make sure the gravel wrap is continuous around the corner so water can move freely to the drain. Cap the top of the gravel with fabric before placing soil, and shape the surface grade so runoff flows away from the wall rather than into the backfill.
My corner courses don’t line up—one side is half a block higher after a few rows. How do I fix it without taking everything apart?
If the mismatch is small (a few millimeters per course), stop and correct immediately before it compounds. Check the base course: a slight tilt at the corner can cause one leg to “climb.” Pull the affected blocks back to the last correct course and re-level that section, scraping or adding base material as needed and re-compacting. If you’re already several courses up and the gap is noticeable, the safest fix is to step back to the course where alignment first went off and rebuild from there—shimming with loose material between blocks usually leads to settling. While rebuilding, keep checking level across the corner (both directions), confirm the setback is consistent on both legs, and maintain a staggered bond pattern so the corner stays tied together.

