
What size gravel to use for retaining wall base

I’m Greg at Sungreen Landscaping Inc, and I’ve lost count of how many times we’ve been called out to look at a block structure that’s started to tilt, then you dig a little and realise the bottom layer is sitting on whatever was handy that day. Round river rock, dusty screenings, sometimes even plain soil. It might look fine the first season. Then Calgary freeze-thaw hits, water gets trapped, things move, and suddenly you’ve got gaps you can slide your fingers into.
The funny part is that people will spend hours choosing the face block, the cap, the colour, and then treat the material underneath like it’s an afterthought. But the stone layer below and the drainage zone behind do most of the heavy lifting. The right mix locks together, compacts tight, and still lets water escape. The wrong mix acts like ball bearings or turns to mush, and then you’re chasing settlement and bowing that never really stops.
This article is about choosing the right rock gradation and chunkiness so the first course stays put and the structure has a fighting chance over the long haul. If you’re also figuring out the full build, we’ve got a step-by-step guide here: how to build a decorative retaining wall. It’s the same stuff we follow on our crews, and we’ve been building outdoor spaces around Calgary since 1990, so it’s not theory.
If you’re unsure about your soil, slope, or how deep you need to excavate, that’s where a quick site visit saves you money. We do free consultations and 2D design samples, and if the structure is over 4 feet we pull the City of Calgary permit and work with an engineer, because guessing on that stuff is a bad plan. Most of the time, at least. If you want to talk it through, call us at (403) 256-7500.
Choosing aggregate gradation under a block structure
Most failures I get called to look at in Calgary are not about the blocks or the cap, they are about what is sitting underneath and what is sitting behind. You can stack decent material and still watch it creep forward a little each spring if the support layer is wrong, or if water has nowhere to go. I have seen a two-foot garden border tilt like a bad tooth just because the builder tossed native clay under the first course and called it good.
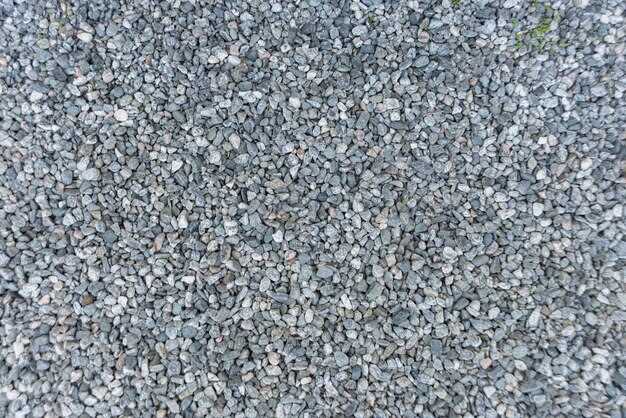
Under the first course, I like a crushed, angular aggregate, not the round river rock you see in decorative beds. Angular stone locks together when you compact it, and that interlock is what keeps the first course from skating around once frost heave starts doing its thing. Around here we lean toward a 20 mm crushed limestone or similar, sometimes called “road crush” depending on the yard and the supplier, and yes, I always ask what they mean by that because every pit seems to name it differently.
If the stones are too fine, you get a mushy layer that holds water and pumps under load. If they are too coarse, you fight voids, and your compactor just chatters on top while the big chunks sit there smugly. A medium gradation with fines mixed in is the sweet spot under the first course, while a cleaner drain rock belongs behind the blocks. Those are two different jobs, and homeowners mix them up all the time, usually anyway.
My go-to mixes on Calgary jobs
For the footing layer under segmental block, we usually place about 150 to 200 mm of 20 mm minus crushed aggregate, compacted in lifts, then set the first course on a thin levelling layer. Behind the face, I want clear drain rock, often around 20 mm clear, because water needs open space to move down to the drain pipe instead of building pressure. If you are curious about alternative materials and how they behave, this page is a decent read: can I use pavers for a retaining wall.
One job I remember in Rocky View County, the homeowner had backfilled with “screenings” because it was cheap and easy to rake. Looked tidy. Then the first big summer rain turned that stuff into a sponge, and by the next spring the face had a belly in the middle. We pulled it apart, swapped the backfill to clear drain rock with filter fabric in the right place, and it settled right down after re-compaction.
A couple practical checks before you place stone
If you grab a handful of your footing aggregate and it packs hard in your fist without turning to mud, that is a good sign. If it feels like beach sand, too fine. If it is basically fist-sized cobble, too coarse. And if you are building anything tall, you do not want guesses in the mix. At Sungreen Landscaping Inc we have been building outdoor spaces since 1990, and for anything over four feet we pull the City of Calgary permit and bring an engineer in, because that is where the loads and drainage details really matter.
If you want us to look at your site, we do free consultations and we can sketch a 2D concept so you can see how the grades and drainage will work before you start hauling stone. Call (403) 256-7500 and we will tell you straight what aggregate gradation makes sense with your soil, your slope, and the height you are trying to hold back. Every job we finish comes with a signed warranty too, which is nice when winter decides to test your yard.
Recommended Gravel Size Range (inches/mm) for a Stable Retaining Wall Base
I’ve seen a lot of segmental block structures lean because the stones underneath were too fine, or too round, or just a random mix someone got on sale. You want angular crushed rock that locks together once you compact it, and that also lets water move through instead of trapping it. That combo is the whole point.
My go-to range under the first course is 3/4″ minus down to fines (about 19 mm down to dust) or, on some jobs, 1″ minus (about 25 mm down). Both compact nicely and still drain. If you jump up to clean 3/4″ (19 mm) with no fines, it drains great but it can feel loose and you end up chasing level as the pieces roll around. Homeowners love the idea of “clean rock” until they try to get it flat.
If you’re working with a heavier segmental system, or the ground is soft clay (welcome to Calgary), I’ll often bump the bottom layer up to a thicker, chunkier crushed stone like 1″–1.5″ (25–38 mm) as a leveling lift, then cap it with 3/4″ minus (19 mm down) so the top tightens up when you pack it. It’s not fancy, it just behaves better under load.
Behind the structure, the drainage zone wants a different gradation than the footing layer. I like clear crushed rock 3/4″ (19 mm) or 1/2″ (12 mm) in that vertical chimney so water can drop to the drain pipe. If you’re also picking block, cap, and finishes, this ties in with material choices like the ones discussed in what is the best material for a retaining wall, because some systems tolerate a little movement and some really do not.
Keep the numbers practical, not “perfect”
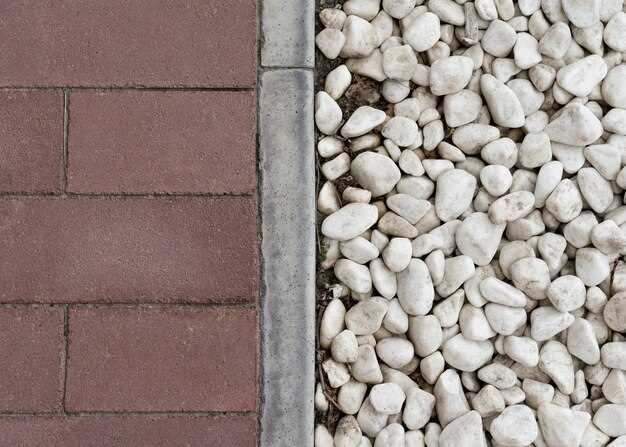
People ask me for one exact spec, but the yard rarely cooperates. If your supplier calls it “road crush,” “¾ minus,” or “20 mm minus,” you’re in the right neighbourhood. The red flags are pea stone (too round) and anything that looks like beach rock. Round pieces don’t knit together, so the bottom course shifts and you get that slow creep forward that shows up after the first freeze-thaw cycle.
There’s also the “too fine” problem. If the material is mostly sand with a bit of rock in it, it compacts hard but it holds water, then pressure builds behind the structure and you’re asking for bulging. We fix that kind of mess all the time on landscaping retaining walls projects, where the face looks good but the backfill was basically soil with a wish.
A quick note on block systems and leveling
If you’re doing a concrete block system, the bottom course needs a properly compacted crushed rock layer, then a thin bedding layer you can actually screed and adjust. That’s a different animal than dry stacking stone. The steps line up well with how to build a cinder block concrete retaining wall, and yes, the rock gradation matters there too because a wobbly first course turns into a crooked job fast.
We’ve been building outdoor spaces since 1990 at Sungreen Landscaping Inc, and the boring truth is this: the safest recommendation is angular crushed rock in the 19–25 mm “minus” range under the first course, with 12–19 mm clear rock behind for drainage. If you want us to look at your soil and your grades, we do free consultations and 2D design samples, and you can reach the office at (403) 256-7500. Most of the time, a five-minute chat saves you a weekend of rework.
Questions and answers:
What gravel size works best for the base of a retaining wall?
For most segmental retaining walls, a compacted base made from crushed stone in the 3/4″ range works well—often sold as “3/4″ minus” or “road base” (a mix of 3/4″ stone and fines). The mix locks together and compacts firmly, which helps the first course of blocks stay level and reduces settling. Avoid rounded pea gravel for the base layer; it doesn’t compact tightly and can shift under load.
Can I use pea gravel or river rock under the first course if that’s what I already have?
You can, but it’s risky. Rounded gravel (pea gravel, river rock) tends to roll and won’t form a tight, stable platform, so the wall can settle unevenly and develop low spots. If you’re trying to use existing material, a safer approach is to reserve the rounded stone for backfill drainage behind the wall, and buy crushed, angular base material for under the blocks. If you only have rounded stone available, you’ll need extra care with leveling and a thicker layer, and it still won’t compact like crushed stone.
Is “3/4" clean” gravel okay, or do I need “3/4" minus” with fines?
“3/4" minus” is usually better for the actual leveling pad because the fines fill voids and the layer compacts into a hard, stable base. “3/4" clean” (washed, no fines) drains very well but stays looser and can shift unless it’s confined and heavily compacted. A common setup is: a compacted leveling pad of 3/4" minus under the blocks, and then a drainage zone of clean stone behind the wall paired with a perforated drain pipe (where needed by your site and local practice).
How thick should the gravel base be, and does gravel size change for taller walls?
Many small residential walls do fine with about 6″ of compacted crushed base, while softer soils or heavier walls often call for more—8″ to 12″ is common. Gravel size usually stays in the same range (around 3/4″ minus for the base). What changes with taller walls is the attention to compaction, trench depth, and drainage: you typically bury more of the first course, widen the base trench, and increase the drainage aggregate volume behind the wall. If the wall is tall or supporting a driveway/slope, it’s smart to follow the block manufacturer’s spec and local code requirements.

